Diving With Artificial Joints: Medical Clearance and Practical Tips
Introduction
If youâve had a hip, knee, or shoulder replacement and are wondering whenâor ifâyou can return to scuba diving, you are not alone. Many divers successfully dive after joint replacement surgery, but it is not something to rush into without proper planning. Diving with artificial joints requires careful medical clearance, an understanding of how the implant affects your diving physiology, and some practical adjustments to your gear and technique. This article covers what you need to know to make an informed decision about returning to the water. Weâll look at the medical considerations, the practical realities of diving with a metal or ceramic joint, and the steps you need to take to dive safely. This is practical guidance from a dive medicine perspective, not a guarantee that every diver with a replacement is a candidate. Your safety comes first.
[IMAGE_1]
Why Diving With Artificial Joints Requires Special Consideration
Diving after a joint replacement is different from diving with a natural joint for several key reasons. The implant itself is a foreign material. Most modern artificial joints are made of metal alloys, ceramics, or high-density polyethylene. These materials have different physical properties than bone and cartilage, particularly in how they respond to pressure changes at depth. While the joint itself is not compressible like a gas space, the interface between the implant and the bone is critical. The bond between the implant and the boneâwhether cemented or relying on bone ingrowth (uncemented)âneeds to be fully stable. Diving does not typically create decompression stress on the joint itself, but the forces from finning, climbing ladders, and maneuvering underwater can stress the joint. There is also the issue of gas diffusion. During a dive, nitrogen dissolves into tissues, including the bone around the implant. On ascent, this gas must come out of solution normally. However, if there is any micro-motion at the implant-bone interface, or if the joint is not fully integrated, there is a theoretical risk of gas accumulation in that space. This is rare with well-healed, stable implants, but it is a factor surgeons and diving doctors consider. Finally, the physical demands of divingâkicking with fins, lifting gear, entering and exiting the waterâplace specific stresses on joints. A hip or knee that works well for walking may not be optimized for the repetitive, forceful movements of finning. The implantâs range of motion, stability, and the surrounding muscle strength all matter. This is not meant to scare you off; it is about being realistic about what your new joint can handle underwater.
Medical Clearance: What Your Surgeon and Diving Doctor Need to Check
Getting cleared to dive after a joint replacement requires two distinct medical opinions. First, your orthopedic surgeon. Second, a physician trained in dive medicine, often through an organization like DAN (Divers Alert Network) or the Undersea and Hyperbaric Medical Society. Do not skip either step. The process typically looks like this: After surgery, your surgeon manages the initial healing phase. You cannot dive until the implant is fully integrated with the bone. For a cemented joint, this might be three to six months. For an uncemented joint where bone grows into the implant surface, it can take six to twelve months or longer to achieve a solid biological bond. Your surgeon needs to confirm that you have adequate range of motion, that the joint is stable, and that there are no signs of infection or loosening. They should also check the implant type. Some newer implants are specifically designed for higher impact activities, which may be relevant for diving. The surgeonâs clearance letter should state that you are cleared for weight-bearing activities and specifically for scuba diving if they are familiar with the demands. Then, you visit a diving doctor. This doctor will assess your overall fitness to dive, considering your medical history, current medications (especially blood thinners, which may increase bleeding risk or affect decompression), and the specific implant. They will look at your ear, sinus, and lung health, as these are frequent issues in divers. They will also consider the nature of the diving you plan to doâshallow recreational dives versus deeper technical diving. A comprehensive diving medical exam costs money but is essential. Do not rely on a standard GP check-up. You need a professional who knows what questions to ask. The clearance may be unconditional or conditional, meaning you can dive but with certain restrictions (like depth limits or single tank only). Be honest about your planned diving profile. This is not the time to downplay your ambitions. The goal is a clearance that is safe for you.
Common Artificial Joints in Divers: Hip, Knee, Shoulder
Each type of joint replacement comes with its own set of considerations for divers. Letâs break down the big three. For a hip replacement, the main concern is range of motion. Standard hip replacements, particularly with a posterior approach, may limit your ability to bend the hip fully. This can affect your finning technique. You may find it difficult to use a long, powerful fin stroke because the hip cannot flex enough. Many divers with hip replacements switch to a shorter, more efficient kick or use specialized fins designed for reduced range of motion. Entry and exit from a boat or shore can also be tricky because of the twisting and loading on the hip. A straight climb up a ladder usually works better than a ladder placed at an angle. Divers who need more flexibility in their finning may benefit from trying fins designed for a shorter stroke. For knee replacements, stability and impact are the primary issues. Your kneeâs ability to handle compression and shear forces is tested during finning, but the most demanding part is often getting in and out of the water. Climbing a ladder with gear puts a lot of stress on the knee. Quadriceps strength is crucial for stabilizing the knee during this movement. Knee replacements can also affect your ability to walk backward or on uneven surfaces, which is often necessary on a dive boat. For shoulder replacements, flexibility is the main challenge. Diving requires reaching overhead to handle tank valves, clip gear lines, and operate BCD inflators. A shoulder replacement, especially a reverse total shoulder, may limit your ability to reach above shoulder height comfortably. Fin removal at the surface, handling a camera, or lifting a heavy tank can be difficult. If you have a shoulder replacement, think carefully about your gear setup. A back-inflate BCD that puts the weight on your hips rather than compressing your shoulders can be helpful. Also, using a tank with an integrated buoyancy system (like a steel tank with a backplate) can reduce the need to reach around. The key takeaway is that while all these joints can work for diving, you need to understand the specific limitations of your implant type and how they affect your unique diving style.
Buoyancy and Trim With an Artificial Joint
An artificial joint can change your buoyancy and trim characteristics underwater. The metal and ceramic components are denser than the bone and cartilage they replace. A total hip replacement, for example, might add a few ounces of weight to one side of your body. In most cases, this change is so small that it barely affects your overall buoyancy. However, if you have a large implant, or if you notice your normal weighting feels off, you should perform a buoyancy check with the new joint. It is a practical habit to get into. Start by performing your buoyancy check with a full tank in shallow water. Make sure you have no extra weight attached. Check if you are positively or negatively buoyant compared to before. If you find you need a little more or less weight, adjust accordingly. The trim aspect is more nuanced. The added mass of the joint can shift your center of gravity slightly. For a hip replacement, this might make you slightly heavier on one side if the implant is large. For a shoulder replacement, it might affect how you lie in the water prone. The best way to assess this is a controlled dive in a pool or confined water. Practice maintaining trim in a horizontal position. See if you feel any imbalance. Most divers find they adjust quickly. If you have a hip or shoulder replacement, pay attention to your body positioning. Avoid holding the joint in a fixed, uncomfortable position to maintain trim. Your trim should be natural and relaxed. If necessary, use small trim pockets or move some weight to the upper or lower part of your BCD to rebalance. A small adjustment of one to two pounds is often enough. Do not try to overcompensate. The goal is to be comfortable and neutrally buoyant throughout the dive. Your artificial joint should not dictate your diving style if you take the time to set up your weighting properly.
[IMAGE_2]
Practical Tips for Gear Setup and Diving Technique
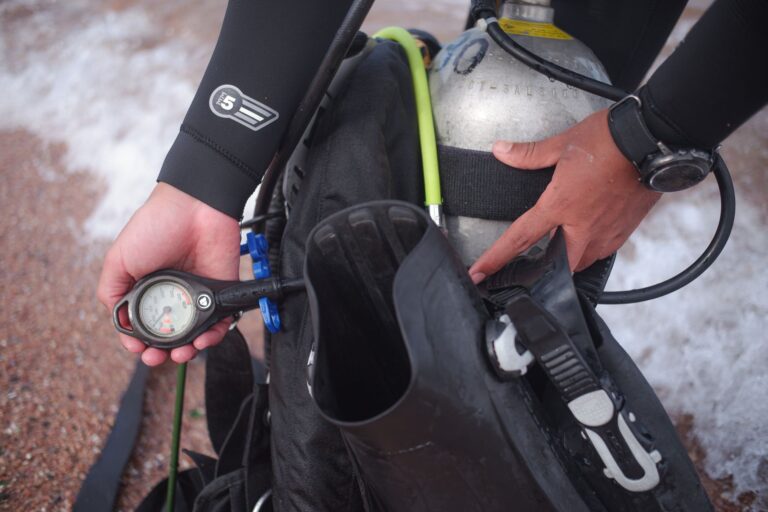
Modifying your gear and technique makes the biggest difference in comfort and safety when diving with an artificial joint. Start with fins. If you have a hip or knee replacement, stiff fins that require a lot of ankle and knee flexion may be uncomfortable. Look for fins with a softer blade or a design that prioritizes a shorter stroke. Adjustable fins are useful because you can adjust the foot pocket to a looser fit if needed. For shoulder replacements, choose fins that are easy to put on and remove without lifting your arm high overhead. Consider a back-inflate BCD. These place the buoyancy cell on your back rather than around your chest and shoulders. This reduces compression on the shoulders and makes it easier to don and doff without needing full range of motion. A back-inflate also keeps the weight closer to your bodyâs center of mass, which can improve stability. For wetsuits and drysuits, choose a suit that is not overly restrictive. A wetsuit with a zip at the front or a closed-cell drysuit that allows easier entry can reduce the twisting and turning that stresses your joints. Thickness matters too. Colder water increases muscle stiffness, which can make a joint feel tighter. Consider a thicker wetsuit or a heated undergarment if you dive in cold water. For entry and exit, plan ahead. A giant stride entry is usually fine for a hip or knee if you can control the impact. For a knee, a seated or roll-back entry might be better to avoid sudden jarring. For ladder climbs, practice a technique where you use your stronger leg to push and your weaker leg to follow. Some divers with knee replacements find a rope ladder easier than a rigid one. The key is to communicate with the boat crew. Tell them you have a joint replacement. They can help with gear handling and provide a low-impact entry if needed. These small adjustments prevent unnecessary strain and keep your diving enjoyable.
Managing Discomfort: What to Expect During and After the Dive
It is realistic to expect some degree of stiffness or mild discomfort when you dive with an artificial joint, especially if you are diving deeper or for longer periods. The cold water, the repetitive movements, and the added weight of gear all contribute. Mild soreness around the joint after a dive is normal. It is your muscles and soft tissues adjusting to the demands of diving. Do not ignore sharp, shooting, or sudden pain during a dive. This could indicate a problem with the implant itself, a muscle strain, or even a partial dislocation in a poorly healed joint. When you feel pain, abort the dive slowly and safely. Do not try to push through it. After the dive, gentle stretching and rehydration can help. Warm the joint with a towel or warm water after the dive if possible. Avoid sudden, jerky movements. If you find that a specific dive profile (like deep decompression dives) consistently causes more pain, adjust your profiles. You might need to limit your depth or bottom time. Pre-dive warm-up exercises can help. Before your dive, spend a few minutes doing range-of-motion exercises for the joint. Gentle circular movements for the hip, knee, or shoulder. This increases blood flow and reduces the risk of stiffness during the dive. Hydration also plays a role. Dehydration can increase muscle cramps and exacerbate joint discomfort. Drink water before and after the dive. If you take anti-inflammatory medication like ibuprofen, check with your diving doctor first because it can affect kidney function and decompression risk in some contexts. The key is to listen to your body. Diving is a physical activity, and an artificial joint does not make you exempt from the normal aches and pains of underwater activity. Being aware of what is normal for you is the best way to catch a problem early.
Diving With Artificial Joints vs. Natural Joints: Tradeoffs and Risks
Letâs compare diving with an artificial joint versus a painful, arthritic natural joint. For many divers, a joint replacement is a solution to a problem that made diving difficult or impossible in the first place. A severely arthritic hip or knee that limits flexion, causes pain during kicking, or makes ladder climbs unbearable is not compatible with diving. A replacement often provides a significant improvement in mobility and pain relief, allowing a return to diving that would have been impossible otherwise. The tradeoff is that you now have an implant with its own set of limitations. The implant can theoretically loosen over time, especially if exposed to repeated stress. While the risk is low with modern joint implants in recreational diving, it is a real consideration for very deep or extreme diving. There is also the infection risk. While diving itself does not cause infection, any open wound near a joint replacement is a serious concern. A diver with a fresh replacement must keep the incision site clean and dry. Proprioception, or the sense of where your joint is in space, is altered after a replacement. You may not feel the same feedback from the joint as you did with a natural joint. This can affect your technique without you realizing it until something goes wrong. For example, you might overextend a knee replacement while climbing a ladder because you do not have the same sense of its position. The advantage of choosing the replacement is that you are addressing a pre-existing problem. The disadvantage is that you are trading one set of constraints for another. In most cases, the tradeoff is favorable for divers who were previously incapacitated by pain. But if you have a hip that is only mildly arthritic and you can dive comfortably, it may not be worth the surgical risk. A replacement is a permanent change. The decision depends entirely on your specific situation. A diving doctor can help you weigh these tradeoffs.
Mistakes To Avoid When Diving With an Artificial Joint
Based on experience, here are the common mistakes divers make when returning to diving after a joint replacement. The biggest mistake is returning to diving too soon. Your surgeonâs six-month timeline might be for everyday walking, not for the stress of diving. Wait for full bone integration as confirmed by X-ray and your surgeonâs clearance for heavy impact activities. The second mistake is ignoring pain during a dive. Do not assume that every ache is just normal discomfort. If you feel a new, sharp, or limiting pain, end the dive. It is not worth the risk of damaging the implant or surrounding tissue. The third mistake is using a restrictive wetsuit or gear setup. A standard wetsuit that compresses your shoulders can be uncomfortable for a shoulder replacement. A drysuit with limited joint mobility in the arms can make operating BCD inflators difficult. Choose gear that is easy to move in. The fourth mistake is failing to adjust your weighting or trim after surgery. As mentioned, the implant can change your balance. Do not assume your old weight configuration works. Perform a new buoyancy check. The fifth mistake is not communicating your condition to your dive buddy or boat crew. Tell them you have an artificial joint. A good boat crew will help you with gear handling and provide a low-impact entry. Your buddy should know in case you need assistance. The sixth mistake is neglecting pre-dive warm-up. Cold muscles and a cold joint do not mix well. Spend a few minutes moving the joint before you enter the water. The final mistake is allowing your dive profiles to drift beyond what your body can handle comfortably. Start with shallow, short dives to test how the joint responds. Do not immediately go to 30 meters for 45 minutes if you have not tested it.
Travel Planning: Insurance, Dive Operator Communication, and Emergency Preparedness
Planning a dive trip with an artificial joint requires additional logistical steps. Travel insurance is critical. Standard travel insurance may exclude pre-existing conditions, including your joint replacement. You need a policy that covers dive emergencies and pre-existing medical conditions. DAN dive insurance is a standard recommendation. They offer plans that specifically cover diving-related injuries and have a strong network of hyperbaric chambers and medical evacuation services. Make sure your policy explicitly covers your implant. Next, communicate with the dive operator before you book. Ask about the dive boat setup. Are there easy ladder climbs? Are there low-impact entry options like a giant stride platform? Will the crew help you with gear? Do not assume every operator is set up for divers with mobility limitations. Many are, but it is best to confirm. When you arrive, give the dive master a clear, concise explanation of your condition. You do not need to overshare, but say: “I have an artificial knee. I can dive fine, but I appreciate help with ladder climbs and gear handling.” This is professional and sets clear expectations. Emergency preparedness means knowing where the nearest recompression chamber is. If you have a joint implant, any dive accident needs to be handled with extra caution because of the potential for complications. Have a medical kit that includes pain relief approved by your diving doctor. Also, have a way to contact your diving doctor or DAN for advice if you experience worrying symptoms after a dive. All of this might sound bureaucratic, but good planning prevents problems. If you are ready to book a dive medical clearance before your trip, we can help you get a thorough assessment.
When To Say No: Signs You Shouldnât Dive With an Artificial Joint
Diving with an artificial joint is not for everyone. There are clear situations where it is unsafe and you should not proceed. First, if your surgeonâs clearance specifically restricts diving, do not ignore it. Some orthopedic surgeons are not dive medicine experts, but they know their patientâs anatomy. If they say no, that is a valid reason to stop. Second, if you have ongoing pain in the joint, instability (like a feeling that the joint is going to give way), or signs of infection in the area, you are not cleared to dive. An infected joint is a medical emergency that requires surgery and antibiotics. Diving could worsen the condition. Third, if you are taking blood thinners (anticoagulants) or other medications that increase bleeding risk, diving may be dangerous. Even minor injuries can lead to significant bleeding. Fourth, if the implant has been removed due to infection or loosening, you cannot dive with that joint until it is replaced or healed. Fifth, if you have a condition that affects your overall fitness to dive, like severe osteoporosis, uncontrolled high blood pressure, or heart disease, your joint replacement is only one part of the picture. The overall risk is higher. Finally, if you have a joint replacement and are planning to dive in a logistically remote location with poor medical infrastructure, it may be wise to postpone the trip. If something goes wrong, you need access to proper medical care. This is not common, but it is a real factor for adventurous divers. The safe choice is to prioritize medical advice over the desire to dive. A diving doctor can tell you definitively if you are safe to proceed.
[IMAGE_3]
Your Next Steps: Getting Cleared and Planning Your First Dive
Returning to diving after a joint replacement is a step-by-step process. Here is a concise checklist. One: Consult your orthopedic surgeon. Get a clearance letter stating that the implant is stable and you are cleared for impact activities, including diving. Two: Schedule a dive medical with a specialist. Bring your surgeonâs letter and your medical history. Three: Wait the recommended time for full bone integration. Do not rush. Four: Adjust your gear and technique based on your specific joint. Perform a buoyancy check. Five: Practice in a controlled environment like a pool or shallow, calm water. Start with short, shallow dives. Six: Plan your travel with the right insurance and communicate with the operator. If you are ready to take the next step, booking a dive medical clearance with us ensures that your return to diving is safe and tailored to your specific situation. We can help you find a diving doctor near you or assess your medical records remotely. Do not risk your health by guessing. Get professional clearance first. Book a dive medical consultation now.