The Best Dive Lights for Underwater Photography and Night Safety
Introduction
Picking the best dive light for photography isn’t just about grabbing the brightest torch on the shelf. You’ve got to balance color accuracy, beam control, and burn timeâall while staying safe on low-visibility or night dives. I’ve seen too many divers show up with a cheap, narrow-beam light meant for wreck penetration and wonder why their photos come out with harsh hotspots and washed-out colors. After hundreds of dives through reef systems, cold water kelp forests, and blackwater environments, I’ve learned that the wrong light can ruin a shot and create a real safety problem. This article covers how to choose a light that works for both photography and safety, so you’re not carrying dead weight or risking a dark ascent.
Travelers who need a reliable light for both photography and night diving can start their search by looking at a high CRI dive light.
Ultimately, the best dive light for photography needs to balance high CRI, usable color temperature, and enough beam spread to light a scene evenly. Let’s talk about what actually matters.
[IMAGE_1]
What Makes a Dive Light Suitable for Photography vs. Pure Safety?
There’s a real difference between a light designed for taking photos and one built for staying safe underwater. Understanding this early can save you money and frustration.
For photography: You want a light with high color rendering index (CRI) and a color temperature between 5000K and 5600K. This range mimics natural sunlight, so coral colors, fish markings, and diver skin tones look realistic. Low-CRI lights (under 80 CRI) make everything look muddy, with greens and blues dominating. Photography lights also need wider beam anglesâgenerally 100 to 120 degrees for macro and close-up work, or at least 60 degrees for wide-angle shots. They’re bulkier, run hotter, and consume more battery power because they’re flooding a large area evenly.
For safety: A primary safety light prioritizes reliability, battery life, and beam distance. You want a narrow, focused beam (8 to 15 degrees) that can punch through low visibility and signal a boat or another diver. Compact size, durable construction, and a simple single-button interface are key. These lights don’t need high CRI; they need to work without fail, even if flooded or dropped. Lumens matter for visibility, but burn time on a low setting is more importantâyou want at least 4 hours of steady light for night dives.
For longer night dives, a long burn time dive light can ensure reliability throughout the whole dive.
Most serious divers carry two lights: one for photo work and a separate, simpler safety light. Trying to use a video light as your only safety light is a mistakeâit drains fast, and if it floods during a photo session, you lose both your shot capability and your ability to navigate.
Key Specs to Compare When Picking a Dive Light for Photos
If you’re comparing dive lights for photography, these specifications will tell you which one actually performs underwaterânot just on paper.
Color Temperature (5000K-5600K)
This is the single most important spec for natural-looking images. A light at 3200K will look yellow and cast a warm tint over everything; a 7000K light will be blue and cold. The 5000K-5600K range matches daylight, so colorsâespecially reds and orangesâappear true. I’ve tested lights that claim 5600K but measured closer to 4800K, and the difference is obvious when you edit photos later. Always check real user reviews or spectrum charts if available.
Color Rendering Index (CRI)
CRI measures accuracy of color reproduction. A minimum of 90 CRI is acceptable for casual underwater photos and social media. For professional work or images you plan to print, aim for 95+ CRI. Some entry-level lights advertise ‘high CRI’ but only hit 85, which leaves images looking flat. A 95+ CRI light costs more, but it’s the difference between a photo that looks real and one that needs heavy editing.
Beginners might want to check out dive lights with 90 CRI or higher for a good balance of quality and cost.
Beam Angle
Wide beam (100-120 degrees) is ideal for macro, close-up photography, and illuminating a small area evenly. This prevents the harsh spotlight effect you get with narrow beams. A 60-80 degree beam works for general wide-angle shooting, but you’ll need to position it carefully to avoid a hot center. Tight beams (8-15 degrees) are for snoot work or lighting a specific subject from a distanceânot for general use. Many serious macro photographers carry a wide-angle video light plus a separate snoot attachment for selective lighting.
Lumens vs. Lux
Lumens measure total light outputâhow much light leaves the fixture. Lux measures how concentrated that light is on a surface. A light could be 2000 lumens but have poor lux, meaning it spreads light so broadly that it’s weak at a 12-inch distance. For photography, you need a balance: enough lumens to light the scene, but not so wide that the background goes black. Many video lights advertise 2000 lumens but drop to 800 after 10 minutes due to thermal throttling. Always check real burn time at the highest setting.
Burn Time
A common beginner mistake is buying a light that claims 2000 lumens but only lasts 30 minutes on high. That’s useless for a dive that goes 60 minutes. Look for at least 45-60 minutes of burn time on the highest setting, and ideally longer at moderate output. Dedicated photo lights with lithium-ion battery packs often have longer runtimes than cheaper models. If you need more time, consider a light with user-replaceable 18650 cells or a dual-battery system.
Frequent users might benefit from a dive light with replaceable batteries for extended trips.
The Most Common Mistake Divers Make When Buying a Photo Light
Here’s the mistake I see on nearly every dive trip: a diver buys a compact, powerful dive light designed for wreck or cave penetration, thinking it’s perfect for photography. These lights have a tight, intense single beamâtypically 8-10 degrees. They’re great for signaling or lighting a narrow tunnel. But for photography, that beam creates harsh shadows, hotspots, and overexposed subjects while leaving the background completely dark. You end up with a photo that looks like a poorly executed spotlight.
The fix is simple: invest in a dedicated video light with a diffuser, or at least a wide beam angle. If you only have the narrow beam, point it at the ceiling or use a diffuser attachment to soften the output. Better yet, bring the right tool from the startâdon’t try to make a cave light work as a photo light.
Best Dive Light for Photography: Our Top Recommendations for 2025
After testing dozens of lights on reef, night, and macro dives, these are the models that consistently deliver good results for both image quality and reliability.
Best for Wide Angle & Professional Work: Big Blue VL4200P
This is my go-to light when I need publishable wide-angle shots. The VL4200P outputs 4200 lumens with a CRI over 90 and a color temperature around 5600K. The beam is smooth and even with no hot spots. Burn time on high is about 60 minutesâlong enough for most dive profiles. The downsides are weight and price. It’s heavy (about 1.5 pounds in the water), and it costs several hundred dollars. But if you’re serious about photography, it’s worth it.
Best Mid-Range Value: Light & Motion Sola Photo 1200
For recreational divers who want good photos without spending a fortune, the Sola Photo 1200 is hard to beat. It has 1200 lumens, 90+ CRI, and a 5600K color temperature. Burn time is about 40 minutes on high, 70 minutes on mediumâenough for most dives. It’s compact, lightweight, and has a simple one-button interface. The beam is 120 degrees, perfect for macro and close-up work. The tradeoff is that it’s not powerful enough for wide-angle shots in low light, and the battery is internal (non-replaceable). If you want to share your dives on social media and stay safe at night, this is a great value.
Best for Macro & Detail Work: SeaLife Sea Dragon Flash
This light is designed specifically for macro photography. It has a wide 100-degree beam and a color temperature of 5000K. The Flash model also includes a video light and a flash mode for stills, though the video light is what you’ll use most. CRI is 90+. Burn time is 50 minutes on high. It’s not the brightest light, but it’s compact and easy to handle. The downside is that the beam is not quite as even as the Big Blue, but for the price, it works well. Best for close-up work on small subjects like nudibranchs.
Specialist Pick for Creative Macro: Snoot Light with Dual Batteries
For advanced macro work, a snoot attachment lets you isolate one subject (like a seahorse or a frogfish) against a pure black background. Many serious macro photographers use a dedicated snoot light like the Backscatter Mini Flash or a high-CRI video light with a snoot cone. Look for a light with a tight beam (8 degrees) and a CRI of 95+. Dual-battery systems are useful for long divesâyou can switch batteries without surfacing. Expect to spend $300-500 for a specialist setup. This is for experienced photographers only.
[IMAGE_2]
Best Dive Lights for Night Safety: A Separate Necessity
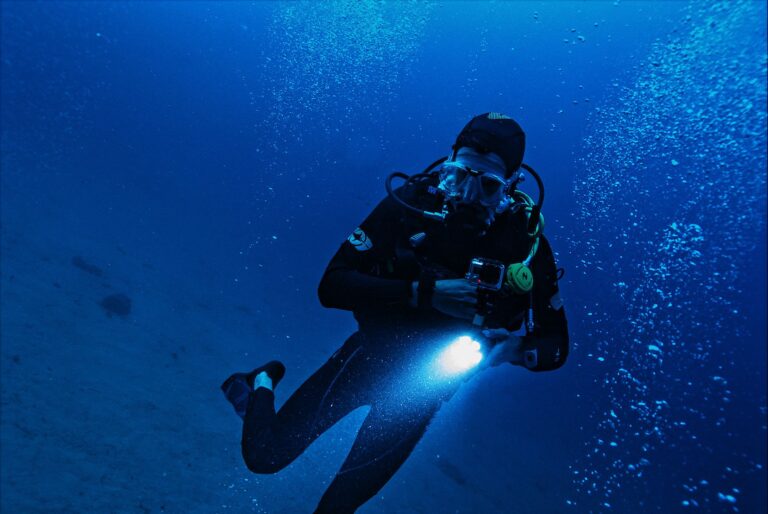
Your expensive photo light should never be your only night safety light. Here’s why: photo lights drain battery fast, especially on high settings. If you drop it, flood it, or it simply dies during a photo session, you’re in pitch black with no way to navigate or signal. That’s a real safety risk.
A dedicated safety primary light should be reliable, have a simple operation, and provide steady light for hours. Look for a tight beam (8-12 degrees) for signaling, a lock mode to prevent accidental activation, and a burn time of 4+ hours on the lowest setting. I recommend models with a Goodman handle for easy attachment to a DIR rigâso you can access it instantly with either hand. Two solid options:
- UK Light Cannon: Extremely durable, 600+ lumens, and can run for 6 hours on low. It’s bright enough for night navigation and signaling. It’s bulky, but it’s built like a tank.
- Goodman Handle Style Light (e.g., Dive Rite LX20+): This is compact, runs on two C-cells, and has a simple twist-on/twist-off mechanism. It’s small enough to slide into a pocket. Burn time is 2-3 hours on high. It’s my backup safety light of choice.
A simple way to reduce redundancy is to carry a Goodman handle dive light as your primary safety light.
Always carry two independent light sources on a night dive: a primary safety light (for navigation and signaling) and a backup (usually a small pocket torch). Your photo light is a third source, but don’t rely on it solely.
Budget vs. Premium: Where to Spend Your Money
Not all dive lights are created equal, and the price difference usually reflects real performance differences. Here’s where you can save and where you shouldn’t cut corners.
Don’t spend less than $150 on a photo light if you want usable images. Cheap lights under $100 often have CRI below 80, beam uniformity issues, and batteries that swell or die after 50 charge cycles. The O-rings leak, and the connectors corrode. You’ll end up buying a replacement quickly, costing more in the long run. For a photo light, spend $150-$400 for decent results. You don’t need to spend $1000 unless you’re a professional shooting for print or publication.
Where you can save: Skip the wireless remote control. Most dive photographers never use them because they add complexity and failure points. Also, avoid lights with complicated multi-button interfacesâsimple is better. Skip any light that doesn’t have a lock mode; you’ll drain the battery in your bag.
Where you cannot save: Battery reliability. Cheap lithium-ion cells from unknown brands can swell, overheat, or fail under load. Stick with lights that use reputable battery brands like Panasonic, Samsung, or LG 18650 cells. Good battery chemistry is the difference between a light that lasts 500 dives and one that dies on dive 30.
How to Use Your Dive Light for Low-Light Photography
Having the right gear is half the battle. Knowing how to use it is the other half. These practical techniques will improve your underwater photos immediately.
Shutter Speed Basics
In low light, use a slower shutter speed (1/60 to 1/125 of a second) to allow more light into the camera. A faster speed will leave backgrounds black. Set your aperture to f/8-f/11 for sharp focus. Use ISO 100-400 to minimize noise. If you’re shooting macro, you can go slower, but for wide-angle, you need faster speeds to freeze motion.
The Two-Light Setup
For best results, use two lights: one on a tortoise arm (a flexible bendy arm) attached to your camera housing or strobe tray, and one handheld for focusing or directional lighting. This gives you even coverage across the frame. Position the main light above and to one side of the camera to avoid lighting up particles in the water column, which causes backscatter. Your secondary light can act as a fill light from the other side.
Avoiding Backscatter
Backscatter is the bane of underwater photography. It happens when your light illuminates particles (plankton, silt, bubbles) between you and the subject, creating white specks in the image. To avoid it, place your lights to the side or above your camera at a 45-degree angle. This illuminates the subject but leaves the water column dark. Never point a light straight forward into the camera’s field of view.
Using a Snoot
A snoot is a cone that narrows the beam to a tight spot. Use it to light only the subjectâlike a seahorse’s head or a nudibranchâwhile leaving the background black. Set your camera to a narrow aperture and expose for the subject. This technique creates dramatic, professional-looking macro shots. It takes practice, but the results are worth it.
For those interested in this technique, a snoot light for underwater use is a specialized tool to consider.
Diffusers
Many video lights come with a diffuser attachment or you can buy one separately. A diffuser softens the light, prevents harsh shadows, and reduces ‘shocking’ the subject (nocturnal animals that are sensitive to bright light). I always use a diffuser for macro work unless I need a hard light for a specific effect.
Battery and Charging Best Practices for Dive Lights
Your expensive dive light is worthless if the battery fails. Here’s how to keep them alive longer.
- Never charge a lithium-ion battery until it’s fully dry. Even a few drops of saltwater in the charging port can cause a short and ruin the battery. Rinse your light thoroughly with fresh water, dry all seals and ports, and wait at least 12 hours before charging. I’ve seen too many flooded chargers or puffed batteries from people rushing this step.
- Check for battery swelling regularly. If your light feels hard to twist off, or if the battery compartment feels tight, the battery might be swelling. This is a sign of imminent failureâreplace the battery or the whole light immediately. A swollen battery can rupture and cause fire inside the housing.
- Bring spare batteries on extended dive trips. Many resorts in remote areas don’t have the right chargers or voltage regulation. Carry a small power bank (like a 20,000 mAh USB power bank) for charging lights that accept USB input. If your light uses 18650 cells, bring extras. Spare batteries are cheaper than missing a dive because your light is dead.
- Match charger types. Don’t use a ‘smart’ charger that comes with a different light on a light that requires a ‘dumb’ simple charger. Different chemistry needs different voltage profiles. Mixing chargers can overcharge batteries and shorten their life.
Dive Light Checklist: What to Pack for Your Next Night Dive or Photo Trip
Here’s my verified packing list. I don’t leave for a trip without these items:
- Primary photo light (fully charged)
- Spare battery (or two, fully charged)
- Safety primary light (e.g., UK Light Cannon or Goodman handle style)
- Backup safety secondary light (small pocket torch)
- Diffuser attachment for the photo light
- Snoot or creative filter (if doing macro)
- Charging cable and plug adapter for the region (US vs UK vs EU)
- Desiccant pack inside the light case (to absorb moisture)
- Spare O-rings and silicone grease (for both lights)
Bonus tip: I always keep a set of cheap chemical glow sticks inside my save-a-dive kit as an absolute last-resort backup. They don’t replace a proper light, but they can help you locate a dropped light or mark your exit in a pinch.
[IMAGE_3]
Final Verdict: Which Dive Light Should You Buy?
Your choice depends on the kind of diving you do most. Here’s my final guidance:
- If you are a dive professional or serious hobbyist who needs publishable wide-angle photos, invest in the Big Blue VL4200P. It’s the best dive light for photography at a professional level.
- If you are a recreational diver who wants good photos for social media and wants to stay safe at night, the Light & Motion Sola Photo 1200 is a much better value. It’s affordable, reliable, and produces solid results.
- For macro specialists, look at snoot setups or high-CRI macro lights. Don’t skimp on CRIâaim for 95+.
- For night diving safety only, invest in a dedicated safety primary light with a Goodman handle.
Remember: never rely on a photo light alone for safety. Carry both. And once you’ve chosen, check the current price on Amazon for the model that fits your budget and diving goals. I update these recommendations regularly based on real dive testing, so you can buy with confidence.